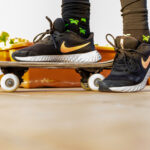
No matter how well you take care of your shoes, they will age and eventually fall apart. The worst part is it always happens to your favorite shoes, not the ones that sit in your closet for three years unworn. Not to worry, you can repair your favorite pair of boots with a little glue and time.
Take a look at the instructions below and get back into your favorite pair of shoes with very little investment.
How to Glue A Shoe Sole Back On
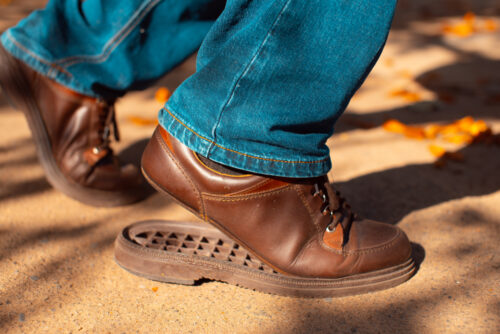
No need to panic, you are just a few steps from getting your shoes back in shape to walk you anywhere you need to go. Suede, leather, sneakers, or boots, you can fix them all. Thankfully, there are now products made to easily repair your shoes right at home.
Steps to Reattach a Sole
Step 1 – Clean the Area
The first step requires you to clean the area around the shoes. As shoes are outside and on the ground often, they get quite dirty, and glue does not stick well to dirt. Use some rubbing alcohol on a microfiber cloth to clean up the shoe and the leftover glue as much as possible.
Let the shoe dry before moving on to the next step. If you want, you can spray the shoe with some disinfectant as you are already cleaning the shoe. Make sure to clean the top and bottom parts of the detached shoe and sole for the best outcome.
Step 2 – Prepare the Shoe
Take out the insoles if they are easy to remove. While this seems unnecessary, it will make the shoe a little more flexible so you can get a better fit on the sole. Also, this helps to clamp the shoe after so it can better absorb the glue and give a strong hold.
Put some brown paper or add whatever you have around inside the shoe in the toe area to make sure it does not move when you reassemble the sole.
Step 3 – It’s Time for Glue
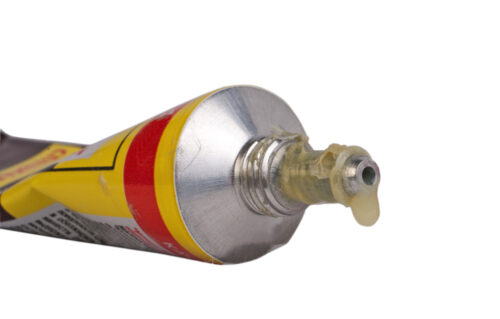
You can find a variety of shoe glues online or in the store to make the next step easier. Glue made specifically for reattaching soles like Shoe Goo will help the shoe top adhere to the sole. Wear disposable or rubber gloves during this process as this is glue and can make a mess on your fingers and skin and may even cause a skin reaction.
Read the instructions before use, including all of the warnings. Pierce the tube to open and put a little oil around the cap to prevent the glue from sealing the cap.
Apply the glue to the shoe, starting in the back and working your way up in small increments. If the area is large, apply the glue directly with even squeezes and use a Q-tip or other device for smaller areas. Equal application offers the best final product.
Work until you have the tip of the shoe glued back into place. Then, keep some acetone (like nail polish remover) or a solvent around to clean up any residual glue. Finally, ensure the glue is as even as possible to prevent discomfort in the shoe.
Step 4 – Clamp the Shoe
Before you can start the next step, let the glue cure for a few minutes and leave the shoe alone. After a couple of minutes, find a way to clamp the shoe against a firm surface with a few heavy books or other objects on the toe to ensure a strong fit.
You will have to clamp twice, focusing first on the arch of the shoe and then later on the toe of the shoe. Leave the shoe like this for a full day to allow the glue to fully set and ensure the shoe is back together. Then, repeat on the toe after doing the body of the shoe.
You may need to play around with clamping depending on the size and style of the shoe to get a secure clamp.
Step 5 – Clean Up
Use acetone or a citrus solvent to remove the excess glue. You can also use a razor but remember to use caution and safety techniques. Remember to put the insole back in the shoe and, if necessary, some paper inside to fix the shape. If possible, wait one more day and allow the shoe to set completely before wearing it again.
Shoe Glue
Several companies make special glue just for shoes. However, other glues can be effective, too, such as Gorilla Glue. Shoes are usually attached with industrial glue, and you are simply re-applying.
If you have Gorilla glue or industrial glue at home, you may be able to save some money and use what you already have in your home. Keep in mind the glue should offer some flexibility as shoes need to bend a lot.
Gorilla glue, like shoe glues, offer materials with flexibility, such as polyurethane. Not all glues offer this same flexibility. However, Gorilla Glue can expand as it cures, and you may need to be light with use to prevent complications later on.
Next, shoe glue needs to be waterproof, quick-drying, and besides being flexible. Loctite also makes a shoe glue that is both strong and flexible to help permanently repair shoes. Special glues for boots are even available for people who work in their boots and require even extra sturdiness.
You do not need to spend a fortune, but you do need to spend a little bit of time to ensure your shoe is fixed. Take your time, and your shoe should be as good as new.
How to Fix A Hole in a Shoe Sole

A simple hole in the sole is a common problem with shoes. So, while not fully separated, there is a gap. Fortunately, Gorilla Glue will simply fill the hole. For the greatest results, make sure to follow the Gorilla Glue instructions.
The simple directions are to clean the area around the hole and then fill it with a modest amount of adhesive. Then, with something like a toothpick, try to rub it into the hole. Allow the shoe to dry fully for at least two days to ensure it’s not sticky or tacky, and make sure to test before wearing.
Remember, Gorilla Glue expands when set, so use as little as possible. Also, remember to use a Gorilla Glue with some flex to ensure the shoe works properly.
Final Thoughts
If the sole of your shoe detaches, you do not need to throw the shoes out. With a little effort, you can repair the shoes at home. Good shoes are expensive, and you can save some serious money by purchasing a little glue to return your favorite shoes to their former glory. Follow the steps above and get your shoes back on your feet for a few more years.