There comes a time in every person’s life when a final sale has them stuck with a pair of shoes that isn’t their perfect sole mate. However, before you give this footwear the boot, there is a simple solution that can actually add up to half an inch of space and better accommodate your tootsies! For those wondering how to use a shoe stretcher, we run through the details.
How To Use A Shoe Stretcher In Seven Easy Steps
Step 1: Consider The Construction Of Your Shoe
First and foremost, the majority of shoe stretchers are designed for flat shoes constructed with natural fabrics. Footwear made with materials like leather, canvas, and suede are the best candidates for stretching.
Conversely, rubber and synthetic-based accessories are less likely to shift from their original shape. Thus, determine if your footwear will benefit from this process.
Step 2: Determine Where You Need To Stretch Your Shoe
Not all shoe stretchers are created equal. In fact, there are seven different types of this product, all designed to remedy distinct issues. What exactly are you trying to fix?
Adjusting Length & Width
A one way stretcher is best suited to fix shoes with a tight toe box. If this area is too narrow, this is the product you need. However, if length is also an issue, then a two way stretcher is required. Both of these tools fix problems in dress shoes and sneakers.
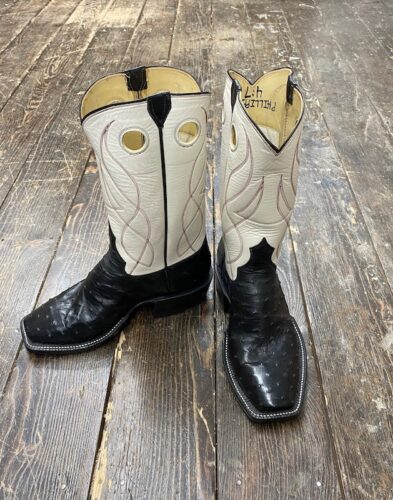
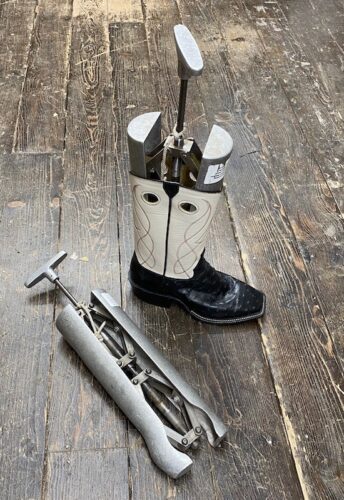
In contrast, for those having trouble with heels and boots, you need to invest in a version of this tool that is specifically designed for these footwear types. Why? The general shape of these accessories varies drastically from flat shoes.
Additionally, you can always add space, but it is very hard to take it back. Stretching with an inappropriate tool may lead to added problems with fit. Moreover, many shoe stretchers made for regular sneakers will be too wide for a narrow toe. In order to be effective, you must have the proper instruments.
Adjusting Height

In case you are unfamiliar with the anatomy of a shoe, the toe box, instep, and vamp are the various sections that span from the front end of the footwear to the bottom end of the tongue. These areas are designed to accommodate the “average” sized foot.
Unfortunately, as we know from Cinderella, this does not accommodate most individuals. Thankfully, there are also shoe stretchers, otherwise known as raisers, that can help to remedy pressure in these regions.
Fixing Localized Spots
Every foot has a unique shape. This can lead to corns, bunions, blisters, hammertoes, and other painful, localized foot health issues that can have an impact on your overall ability to function. This is where a ball and ring shoe stretcher comes in handy. Instead of evenly stretching the entire width or height of the shoe, you can pinpoint exactly where you need a little added space.
Step 3: Prepare The Shoe Stretcher Before Use
When it comes to stretching your shoes, a little goes a long way. Therefore, once you have selected and purchased the proper shoe stretcher, reduce the length and width of the device before trying to put it in the shoe. This will ensure that you only apply pressure in the areas that you need.
Step 4: Don’t Jeopardize The Integrity Of The Shoe
Another important item to purchase before starting this process is a stretch spray. This is essentially a softening agent that helps to lubricate the fibers of the fabric, better guaranteeing that the integrity of the shoe stays intact.
Apply the spray to the interior and exterior of the shoe before starting the stretching process. Then, allow the softener to sit for a few minutes before proceeding with the remainder of the steps.
IMPORTANT NOTE: When using this product, follow the instructions dictated on the packaging. In most cases, manufacturers recommend that you not spray the softener too close to the outer fabric of the shoe. This could cause discolorations in the material.
Step 5: Stretch Your Shoe Slowly
Once the stretcher is small enough to easily slide into the shoe and you have applied your shoe spray, gently place the device inside. Then slowly begin to expand the tool length-wise, width-wise, or height-wise and continue until the device is snugly in place. Repeat this step for the alternate orientation if you are using a multidirectional stretcher.
Give the device an extra two to three turns in the direction you hope to expand. Keep in mind, just like a rubber band, once you have pulled on it enough, it will never revert back to its original size. Therefore, it is best to increase the space in small increments.
This can take a matter of days, but it will be a worthwhile endeavor in the end. Finally, leave the tool to do its job. This can take up to eight hours. Once this time has passed, shorten the stretcher and carefully remove it from the shoe.
Step 6: Take A Walk
Once you have used the shoe stretcher, it is important that you take a stroll around your home. Where do you still feel tightness and pressure? Remember that a shoe should be snug, but there also needs to be a small amount of wiggle room. If you notice pinching or discomfort, you will have to stretch the shoes for longer.
PRO TIP: Always conduct this process in the evening when your feet are at their largest. You want to ensure that the shoes do not become too small after a long day on your feet.
Step 7: Keep Your Shoes In Pristine Condition With A Shoe Tree
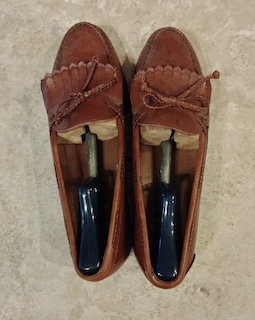
A perfectly shaped shoe will only maintain its form if you take the proper steps. Purchasing a shoe tree can be an amazing investment in preserving the original quality of your footwear. This simple, cedar device looks very similar to the shoe stretcher and many times can actually serve the same function.
When your shoes are not in use, insert the shoe tree into your footwear. This will support the shape, diminish wrinkles in the fabric and help to remove unwanted moisture and odors (when cedar versions are purchased). Most importantly, it will increase the longevity of your footwear.
Things To Remember When Using A Shoe Stretcher
If this is your first time using this tool, experiment on a similar pair of shoes that you don’t mind ruining. This can help to give you an idea of how a shoe will change based on the number of turns you make on the crank and the size of the bunion plug you decide to use.
Moreover, time is of the essence. Too little time and the shoes will not properly stretch. In contrast, if you stretch the shoes for too long, you will create more space than what is needed. In order to get the fit just right, check on the shoes periodically. Remove the stretcher to try them on and then continue with the process as needed.
What To Look For In A Shoe Stretcher

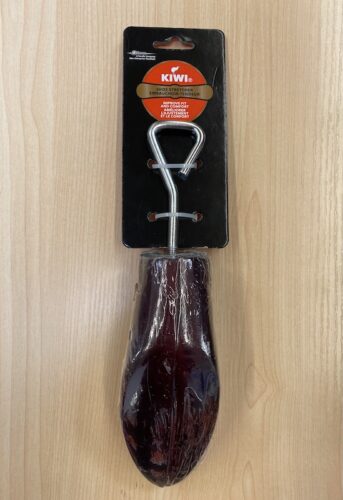
Ball and ring shoe stretchers and boot stretchers are made of metal. This is a great quality for stretching any type of material, especially thick products like leather. However, the remainder of the shoe stretchers on the market are made with either wood or plastic. While plastic is an affordable choice, if you are stretching a thick leather, it will likely not be as effective as its competitor.
Most high-end shoe stretchers use cedarwood. This is a fantastic option due to the fact that it is hardwood. Since the intent is for the stretcher to apply pressure to the fabric, you want a material that can withstand the force without the worry of breakage. Cedar accomplishes this goal. Best of all, this type of wood will absorb moisture. This will soak up any excess stretch spray during the process.
Lastly, for those who are looking to get the most bang for their buck, look for multidirectional products that have the option for attachments. Many shoe stretchers have holes drilled into different sections of the toe box. This feature serves the same purpose as a ball and ring stretcher, without the need for an additional purchase.
Final Thoughts
Finding the perfect size can be a daunting task, but with the use of a shoe stretcher, a more comfortable fit is easily attainable. When using this seemingly simple tool, remember that patience is a virtue and that it may require a few rounds of stretching before achieving the ideal proportions for the unique shape of your feet.
Additionally, keep in mind that no two feet are alike, even your own. Asymmetry is normal in these extremities, which means that you need to adjust each shoe in accordance with the different contours of each foot. How you use the shoe stretcher for your right shoe may vary for the left.
Thus, always try on your shoes before and after each stretch. Then, make modifications accordingly. Finally, this device is a fantastic remedy for small sizing issues, but it is not a magic genie in a bottle. A shoe can only stretch so much before it breaks. Therefore, make a point to try to find the right fit and then make minor adjustments as needed.